What is Anaconda? Anaconda is a software bundle that includes Python, pandas, and 100+ packages for data analysis. Anaconda is a distribution of Python. Anaconda also includes its own virtual environment system. It’s very popular in the data science community. For installing Anaconda on Windows you will first need to know whether you have a 32-bit or a 64-bit system. You can go here to find out. I have Windows 11 on a 64 bit computer using a 64 bit version of Windows. Here is what I see: 64-bit operating system, x64-based processor beside system type.
Anaconda comes with a development environment called Jupyter where we can write Python code, display images by linking to them (like HTML does) and write markdown notes (and format those notes). Markdown is a great way to document your code partly because it looks better than using comments in your code.
Installation
To download Anaconda you can first go to their Anaconda.com website. There are different versions of Anaconda for Windows, macOS and Linux.
Anaconda will install Python, pandas and about a hundred other data analysis libraries. But what it’s also going to install for us is something called Conda. Conda is an environment manager. An environment is essentially a sandbox for a different configuration of Python and its packages. You’re working on a team where one code base needs Python 3.7 and let’s say pandas 1.2, while another code base needs Python 3.9 and pandas 1.3. We have different version requirements between different projects or different code bases.
Conda allows us to create its own environment. An environment is just an isolated directory or folder on your computer where Conda is going to install whatever versions of software you would like. Typically what you’re going to see is one environment per project. Each of those environments is distinct and independent and separate.
After the Anaconda installer finishes, you should also have a program called Anaconda Prompt. Its a command prompt. You should see (base) and a directory. You can run your familiar commands like dir, cd, md and so on. After it’s installed you should see the Anaconda Navigator. When you run that program you should see the option for running Jupyter Notebook. Click on that and the browser will open.
What if you don’t want start in the directory specified? It might be System32 or something in the Users directory. What can you do to change that? In Windows, click on the Start button, find Anaconda Prompt (begin typing Anac…), right click and select Open File Location, right-click the application name ( ) Properties, Shortcut Tab, Start in, and put the directory you want in the box.
Environments
Let’s have a look at the environments we have. We will run:
conda info --envs
It’s a good idea to update conda before go ahead. To do that you might need to run the Anaconda Prompt as the Administrator. Here is the command to update Conda: conda update conda
Create is the command we give to the conda application to create a new environment. We’re gonna give it a flag. That flag is going to be “–name.” So, before conda can create an environment it needs to be told the name that you’d like to give it. The name is up to you. Suppose we call it pandas_env. You will want to provide a more descriptive and specific name.
conda create --name pandas_env
Now we need to activate our new environment.
conda activate pandas_env
We have activated our new environment. Now we can install. We can install several packages at a time. These two libraries will speed things up. We won’t need to use them, just install them.
conda install pandas jupyter bottleneck numexpr matplotlib
We get a huge list of libraries because many libraries are dependent on other libraries.
Graphviz
I was working on creating a decision tree model with the Iris dataset using the book called Hands-On Machine learning with Scikit-Learn , Keras & TensorFlow in chapter 6 Decision Trees. I required to use of a package called graphviz. When I attempted to execute the code from graphviz import Source in my locally installed Jupyter Notebook, I got an error saying that graphviz was not found. I used Stack Overflow to find the solution. The article is called No module named ‘graphviz’ in Jupyter Notebook. They said to install it using these two lines of code:
conda install -c anaconda python-graphviz
conda install -c anaconda pydot
The first command didn’t work because I needed to first give myself security permissions to the folder C:\Windows\Program Data\Anaconda3. I ran these two lines again (one at a time) and it worked and so did the code from the book.
Anaconda Navigator
As of November 2024, the version of Anaconda Navigator is 2.6.3. Anaconda Navigator is a desktop graphical user interface (GUI) included in Anaconda® Distribution that allows you to launch applications and manage conda packages, environments, and channels without using command line interface (CLI) commands. Here is a screenshot showing part of the interface in Windows.
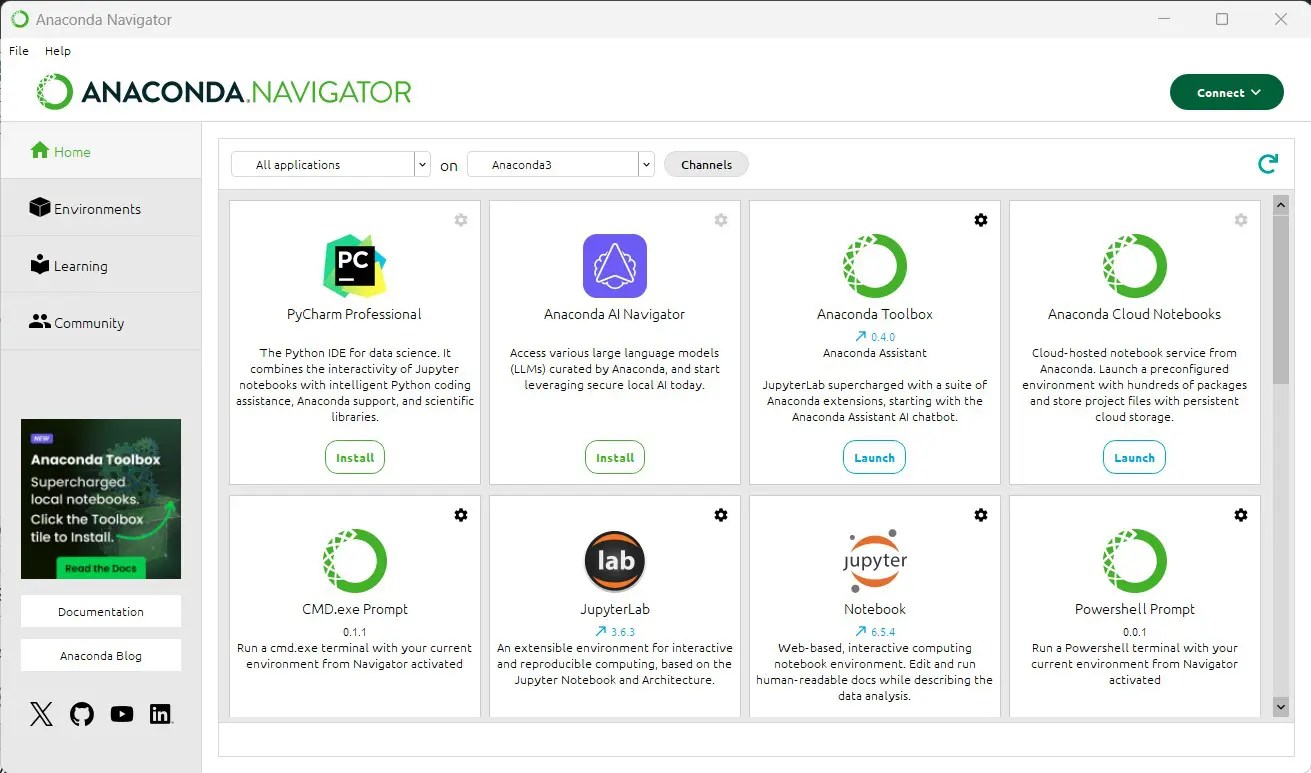
If you want to run a Python program, you would click the Launch button of Jupyter Notebook.
Windows Powershell or cmd
Powershell and Anaconda don’t work perfectly together, so use a command prompt (cmd) when working with Anaconda.