- WPF SQLite Dapper List and Add People – 1
- WPF Installing SQLite and Dapper into a WPF Project
- WPF SQLite Dapper List and Add People – 3
- WPF SQLite Dapper List and Add People – 4
How do you install SQLite and Dapper into your Windows Presentation Foundation (WPF) project? Why would you do this? You want to do this because you’d like to store some persistent data with your project, without having the added complexity of a SQL Server, Oracle database or some other database. The WPF app that you are building does not require a central database. A local database will work fine because your application stands alone. SQLite is a great choice for this and Dapper helps to simplify your code.
YouTube Video
If you like to watch videos to learn how to do things, have a look at IAmTimCorey’s video Using SQLite in C# – Building Simple, Powerful, Portable Databases for Your Application at YouTube starting at time 4:30 in the video. Tim is installing SQLite into a WinForms project in that video. If you are using a WPF project, don’t worry, it’s the same procedure. Tim describes the procedure for installing the SQLite software using NuGet at time 19:00 in the video. Right-click References in the Solution Explorer, Manage NuGet Packages…, search for SQLite, and install the “Core”, “The official SQLite database engine…”

As of December 12, 2020, the number of downloads is now 10.5M and the version is 1.0.113.6.
Create a Database with DB Browser
You’ll want to install the SQLite database file into the directory (folder) of the project you are working on. To get that path, right-click the name of the project in the Solution Explorer in Visual Studio and then click Open Folder in File Explorer. Copy the path.
- Open your DB Browser for SQLite.
- Click the New Database button.
- Paste in the path (at the top of the window) and press Enter
- In the File name box (at the bottom) type in a database name. Tim uses DemoDB.db for the name of his database, but yours may be what you wish, but it should probably be similar to your project name.
- The next screen that appears is the Table screen. Provide a Table name
- Click Add Field to start to create your table. Create it. Ok.
- Click File, Write the Changes and close the database.
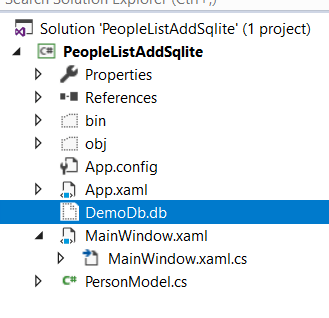
After you’ve installed your SQLite database file into your WPF project and clicked Show All Files in Solution Explorer in Visual Studio, you should see your database file in the list. Right-click the database file and choose Include In Project. The icon will change from a white icon to a dark icon. Select the database file if not already selected, and select Properties. Change the Build Action to Content. Change the Copy to Output Directory to Copy if Newer. Below is a screenshot of how the icon will appear after you’ve added it to your project in Solution Explorer of Visual Studio.
![]()
Installing Dapper
Installing Dapper is easy. We have another post on that topic. The post is called Dapper Installation into Visual Studio.