- WPF Resources Introduction
- WPF Resources Introduction Part 2
- WPF Resources Introduction Part 3
- WPF Assembly Resources
WPF supports two types of resources: binary and logical. Binary resources include, for example, images or icons that are supplied from outside the code. These are also called assembly resources. These are resources in the common sense of the term as it’s been used since the beginning of Windows programming. With respect to logical resources, WPF also uses the term resources in a new way, to describe .NET code objects that are stored in an object dictionary and then used at various places throughout the code. These are usually associated with XAML markup but can also be used in the code-behind. These are also called logical resources, object resources, or XAML resources.
The ResourceDictionary
General-purpose class libraries often provide classes called dictionaries, which you can use to store items you want to save and retrieve later. A dictionary is a container that stores key-value pairs, where the value is the object you want to store, and the key is the object you use to look it up, after it’s stored. There is an earlier post called Generics Dictionary that shows a small example of a dictionary in C# code.
WPF provides a dictionary class called the ResourceDictionary, which is the basis for WPF’s logical resources. The ResourceDictionary class implements a dictionary into which you can place references to objects of any type, using keys of any type. The objects are always stored as references of type object, so after you retrieve them from the dictionary, you must cast them back to their original type.
Logical Resources
Below is a simple example. First, the XAML listing shows just one button that does not use the logical resources. The second listing shows the full XAML code that uses logical resources.
<Button Background="Yellow" BorderBrush="Red" Margin="5">
   <Image Height="21" Source="zoom.gif"/>
</Button>
Below is the full XAML listing.
<Window x:Class="Resources122.MainWindow"
xmlns="http://schemas.microsoft.com/winfx/2006/xaml/presentation"
xmlns:x="http://schemas.microsoft.com/winfx/2006/xaml"
xmlns:d="http://schemas.microsoft.com/expression/blend/2008"
xmlns:mc="http://schemas.openxmlformats.org/markup-compatibility/2006"
xmlns:local="clr-namespace:Resources122"
mc:Ignorable="d"
Title="Resources122" Height="180" Width="400">
<Window.Resources>
<SolidColorBrush x:Key="backgroundBrush">Yellow</SolidColorBrush>
<SolidColorBrush x:Key="borderBrush">Red</SolidColorBrush>
</Window.Resources>
<Window.Background>
<StaticResource ResourceKey="backgroundBrush"/>
</Window.Background>
<DockPanel>
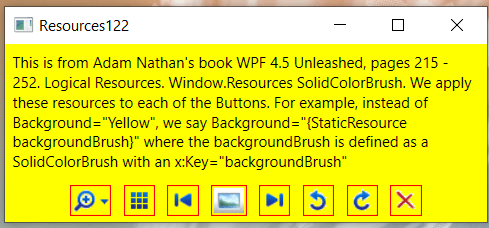
<TextBlock Margin="6" TextWrapping="Wrap" DockPanel.Dock="Top">This is from Adam Nathan's book WPF 4.5 Unleashed,
pages 215 - 252. Logical Resources. Window.Resources SolidColorBrush. We apply these
resources to each of the Buttons. For example, instead of Background="Yellow", we say
Background="{StaticResource backgroundBrush}" where the backgroundBrush is defined
as a SolidColorBrush with an x:Key="backgroundBrush"</TextBlock>
<StackPanel DockPanel.Dock="Bottom" Orientation="Horizontal"
HorizontalAlignment="Center">
<Button Background="{StaticResource backgroundBrush}"
BorderBrush="{StaticResource borderBrush}" Margin="5">
<Image Height="21" Source="zoom.gif"/>
</Button>
<Button Background="{StaticResource backgroundBrush}"
BorderBrush="{StaticResource borderBrush}" Margin="5">
<Image Height="21" Source="defaultThumbnailSize.gif"/>
</Button>
<Button Background="{StaticResource backgroundBrush}"
BorderBrush="{StaticResource borderBrush}" Margin="5">
<Image Height="21" Source="previous.gif"/>
</Button>
<Button Background="{StaticResource backgroundBrush}"
BorderBrush="{StaticResource borderBrush}" Margin="5">
<Image Height="21" Source="slideshow.gif"/>
</Button>
<Button Background="{StaticResource backgroundBrush}"
BorderBrush="{StaticResource borderBrush}" Margin="5">
<Image Height="21" Source="next.gif"/>
</Button>
<Button Background="{StaticResource backgroundBrush}"
BorderBrush="{StaticResource borderBrush}" Margin="5">
<Image Height="21" Source="counterclockwise.gif"/>
</Button>
<Button Background="{StaticResource backgroundBrush}"
BorderBrush="{StaticResource borderBrush}" Margin="5">
<Image Height="21" Source="clockwise.gif"/>
</Button>
<Button Background="{StaticResource backgroundBrush}"
BorderBrush="{StaticResource borderBrush}" Margin="5">
<Image Height="21" Source="delete.gif"/>
</Button>
</StackPanel>
<ListBox/>
</DockPanel>
</Window>
This works in much the same way as Cascading Style Sheets (CSS) work in HTML. It uses the StaticResource markup extension. (StaticResource is short for System.Windows.StaticResourceExtension). This is applied to Window.Background using property element syntax and to Button.Background and Button.BorderBrush with property attribute syntax. If you look at HTML attributes you will notice that they use an attribute syntax that is the same as the property element syntax.
Assembly/Binary Resources
The book Illustrated WPF explains assembly/binary resources in the following way. Assembly resources are digital objects, such as images, that aren’t generated by the source code. Assembly resources can be embedded in the executable, or you can supply them to the executable as separate files, also called loose files.
To embed a resource in the executable, first add the resource to the Visual Studio project. The easiest way to do this is by right-clicking the project name in the Solution Explorer, selecting the Add, Existing Item… menu selection, and navigating to the item. Visual Studio then adds to the project the item you selected. Next you need to tell Visual Studio to embed the resource in the executable in the form that WPF uses. You do this by setting the Build Action property in the Properties window. To show the Properties window, right-click the resource name (which is now visible in the Solution Explorer), and select the Properties menu item. In the Properties window, select Resource—not Embedded Resource, for the Build Action.
Although it sounds like exactly what you want, make sure you don’t choose Embedded Resource. This option stores the resource in a different part of the assembly that is used by the Windows Forms framework, but it is much more difficult to access from WPF.
Assembly Resources
If you want to embed your graphic files (.gif) into the program itself there are a couple of things you need to do. First, add the graphic file to the project. Next, set the file’s Build Action property to Resource. I have done that for only one of the graphic files so that you can see what happens when this is not done.


Assembly resources are covered more thoroughly in the post Assembly Resources.
Code Behind
The next post will illustrate how to use C# code behind to store and retrieve a SolidColorBrush in a StackPanel’s Resources property from the book Illustrated WPF.